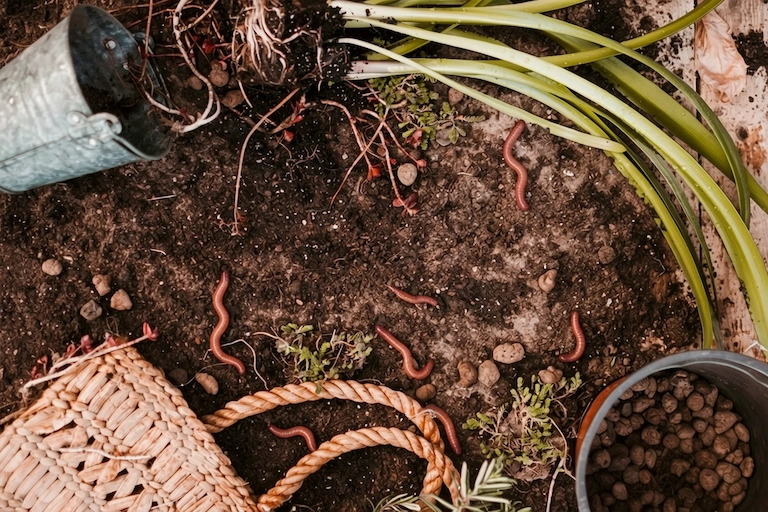
Vermicomposting At Home: Turn Food Waste Into Rich Compost
Food scraps do not belong in the trash. Vermicomposting at home turns them into dark, crumbly compost using a small bin and a few worms. You do not need a backyard. You also do not need much time. This guide shows you how to start, what to feed your worms, and how to fix common problems.
What Is Vermicomposting?
Vermicomposting means composting with worms. The worms eat your kitchen scraps and leave behind castings. Castings are the finished compost, and plants love them.
Most home bins use red wigglers, also called tiger worms. Their scientific name is Eisenia fetida.Oklahoma State University Extension recommends this species for worm bins. Garden soil worms and fishing bait worms are not the same. Bait worms are often invasive species, so buy red wigglers from a worm farm instead.
Why Try Vermicomposting at Home?
Food waste is a bigger climate problem than most people think. The EPA says food is the most common material sent to landfills. Food buried in a landfill releases methane, a powerful greenhouse gas.
A worm bin keeps scraps out of that cycle. MU Extension says worm composting can cut household food waste by up to two thirds. Here are a few more reasons to start:
- It works in small spaces, such as under a sink or in a garage.
- It needs less work than an outdoor compost pile.
- It makes free fertilizer for houseplants and gardens.
- It teaches kids where food waste goes.
Cities are also pushing food waste programs. Our look at climate solutions every city should implement shows why. A home bin lets you start now, even before your city does.
What You Need to Start
You only need three basic supplies to get started: a bin, bedding, and composting worms.
The Bin. A plastic tote or wooden box can both work. Wood absorbs moisture and helps reduce temperature fluctuations. Plastic is cheaper, but it does not breathe as easily, so watch the moisture levels closely. Choose a bin that is about 8 to 12 inches (20 to 30 cm) deep.
The size. Weigh your food scraps for one week. MU Extension recommends about one square foot of bin surface area for each pound of food scraps produced per week. As a general guideline, allow at least two square feet of surface area per household member. Adjust the size based on how much food waste you produce.
The Bedding. Shredded newspaper, cardboard, dry leaves, and coconut coir all work well. Mixing a few materials creates a suitable bedding environment. Moisten the bedding until it feels like a wrung-out sponge.
The Worms. Red wigglers are a popular choice for home vermicomposting because they thrive in worm bins. Start with a suitable quantity based on your bin size and the amount of food waste you plan to add. You can increase the amount of food as the worm population grows.
How to Set Up Your Worm Bin
Setup takes about 30 minutes. Follow these steps:
- Drill small holes in the lid for air. Add drainage holes in the bottom, with a tray below to catch liquid.
- Tear the bedding into thin strips.
- Soak the bedding in water, then squeeze it out. It should feel like a wrung out sponge.
- Fill the bin about two thirds full with this bedding. Fluff it so air can move through.
- Let the bedding settle for a few days.
- Add the worms and let them burrow down.
- Bury a small handful of food scraps and close the lid.
Worms like the dark. So keep the lid on and place the bin away from direct sun.
What to Feed Your Worms
Worms are not fussy, but some foods cause trouble. Start with a small amount and add more as the worms settle in.
Good foods:
- Fruit and vegetable scraps
- Coffee grounds and paper filters
- Tea bags
- Bread and cooked grains
- Crushed eggshells
Foods to avoid:
- Meat, fish, and bones
- Dairy products
- Greasy or oily food
- Pet waste
- Citrus peels in large amounts, because they make the bin acidic
Chop scraps into small pieces. Smaller pieces break down faster. Add a thin layer of food about once a week, then cover it with bedding. This keeps odors and fruit flies away.
How to Care for Your Worm Bin
Good care is mostly about two things: temperature and moisture.
Temperature. Worms work best between 60 and 75°F (15 to 24°C). They slow down in the cold. They start to die above 85°F (29°C). In summer, move the bin to a shaded spot. Gardeners in hot regions can read our guide on September heat for US gardeners. Its cooling ideas suit a worm bin too.
Moisture. The bedding should feel damp, never soggy. If it is too wet, add dry shredded paper. If it is too dry, mist it with water.
Feeding. Do not overfeed. Uneaten food is the main cause of smells. If food is still there after a week, wait before adding more.
Common Problems and Easy Fixes
Most vermicomposting problems come from excess food, moisture, or poor bin conditions. Here are some simple ways to fix them.
- Bad smell: Stop feeding for a few days and remove any rotting food, meat, or greasy items. Gently loosen the bedding and add dry shredded paper or cardboard to absorb excess moisture.
- Fruit flies: Bury food scraps under the bedding instead of leaving them exposed. Avoid adding too much food at once, and cover ventilation holes with fine mesh if flies keep entering.
- Worms trying to escape: Check whether the bedding is too wet, too dry, or too acidic. Add dry bedding if needed, remove excess food, and make sure the bin has proper airflow.
- Slow breakdown: Chop food scraps into smaller pieces and check the bin temperature and moisture. Also, make sure the worms have enough suitable bedding and are not being overfed.
How to Harvest and Use Worm Compost
Finished compost is ready in about 2 to 5 months. It looks dark and smells earthy, and the bedding is mostly gone. Most people harvest two or three times a year.
One easy method uses light. Dump the contents in small piles on a plastic sheet under a bright lamp. The worms move to the center of each pile. Scrape off the compost and return the worms to fresh bedding.
Here is how to use your castings:
- In garden soil: Mix a half inch to one inch into the top 6 inches.
- As mulch: Spread a thin layer around plants.
- In potting mix: Use about one quarter to one third of the mix.
Rules apply to food crops. Apply compost at least 90 days before harvest for crops that grow above the soil. Wait 120 days for crops that touch the soil. Flowers and shrubs have no such limit. This compost also helps if you plan a wildlife friendly garden. Our rewilding garden ideas show how healthy soil supports pollinators.
Final Verdict
Vermicomposting at home is one of the easiest ways to cut food waste. It needs little space, little money, and little time. Start small, feed lightly, and keep the bin damp and cool. In a few months, your scraps become rich compost for your plants. It is a simple habit with a real climate benefit.
FAQs
Q1. Does vermicomposting at home smell?
Ans. A healthy bin smells earthy, not rotten. Bad smells usually mean too much food or too much water.
Q2. How many worms do I need to start?
Ans. About 1 pound of red wigglers for each square foot of bin surface is a good target. You can begin with less, and the worms will multiply.
Q3. Can I keep a worm bin indoors?
Ans. Yes. A bin under the sink, in a basement, or in a garage works well. Just keep it between 60 and 75°F (15 to 24°C).
Q4. How long does it take to make compost?
Ans. Expect about 2 to 5 months. Smaller food pieces and steady care speed up the process.